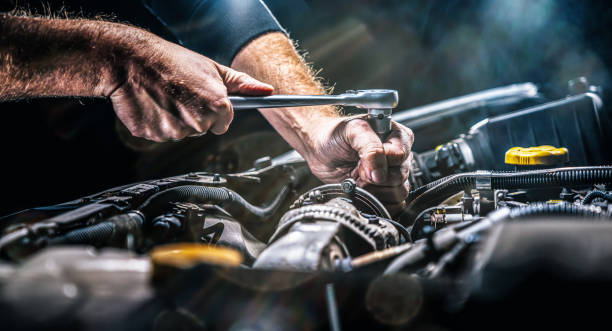

Detailing a truck is a complex process that not only thoroughly cleans it but also rejuvenates it in terms of both its appearance and functionality. It entails the cleaning, restoration, and protection of all components of the vehicle, including the interior upholstery and exterior paint. It is imperative to comprehend the proper method of detailing a truck, regardless of whether you are a professional detailer, a truck devotee, or a truck owner seeking to maintain the value of your vehicle. This comprehensive guide will guide you through the process of achieving a showroom-quality finish, step by step.
Step 1: Gather Your Supplies
Before you start detailing, ensure you have all the necessary tools and products. Here’s a list of essentials:
- Buckets (at least two for the two-bucket wash method)
- Car wash soap
- Microfiber wash mitts
- Microfiber towels
- Wheel cleaner and brushes
- Tire cleaner and tire shine
- Clay bar and lubricant
- Polishing compound and pads
- Car wax or sealant
- Interior cleaner and protectant
- Glass cleaner
- Vacuum cleaner
- Upholstery cleaner
- Detailing brushes
- Pressure washer (optional but recommended)
Step 2: Pre-Wash Inspection
Begin with a thorough inspection of the truck. Identify areas that need special attention, such as tar spots, bug splatters, or bird droppings. This step helps you plan your detailing process and ensures you don’t miss any critical areas.
Step 3: Exterior Cleaning
Wash the Wheels and Tires
- Rinse: Start by rinsing the wheels and tires to remove loose dirt and debris.
- Apply Cleaner: Spray a dedicated wheel cleaner on the wheels and a tire cleaner on the tires.
- Scrub: Use a wheel brush to scrub the wheels and a stiff-bristled brush for the tires. Make sure to get into all the nooks and crannies.
- Rinse: Thoroughly rinse the wheels and tires with water.
Pre-Wash Rinse
Rinse the entire truck with a pressure washer or garden hose to remove loose dirt and contaminants. This step prevents scratching the paint during the washing process.
Two-Bucket Wash Method
- Fill Buckets: Fill one bucket with soapy water and the other with clean water.
- Wash: Dip your microfiber mitt in the soapy water and wash the truck from top to bottom, section by section. Use the clean water bucket to rinse the mitt frequently.
- Rinse: After washing each section, rinse it with water to prevent soap from drying on the paint.
Step 4: Decontamination
Clay Bar Treatment
- Prepare Clay Bar: Flatten the clay bar and spray a clay lubricant on a small section of the truck.
- Clay: Gently rub the clay bar over the lubricated area in a back-and-forth motion until the surface feels smooth.
- Wipe: Wipe the area with a clean microfiber towel.
This process removes bonded contaminants like sap, tar, and industrial fallout that washing alone can’t remove.
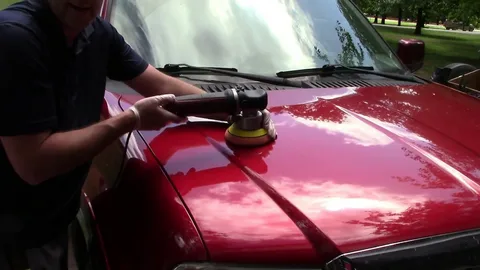
Step 5: Polishing
- Apply Polishing Compound: Apply a small amount of polishing compound to a foam pad or polishing machine.
- Polish: Work the polish into the paint using a circular motion or machine buffer, focusing on one section at a time. This step removes minor scratches, swirl marks, and oxidation.
- Wipe Off: Wipe off any residue with a clean microfiber towel.
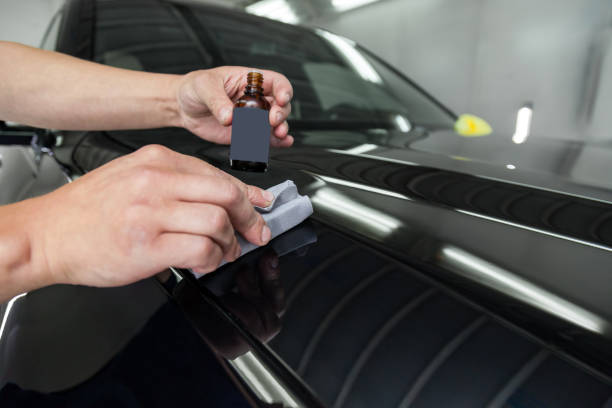
Step 6: Protection
Wax or Sealant
- Apply Wax/Sealant: Apply a thin layer of car wax or sealant using a foam applicator pad.
- Allow to Haze: Let it haze according to the product instructions.
- Buff: Buff off the wax or sealant with a clean, dry microfiber towel, revealing a glossy, protected finish.
Step 7: Interior Detailing
Vacuuming
- Remove Debris: Remove all floor mats and any loose items from the interior.
- Vacuum: Use a vacuum cleaner with appropriate attachments to vacuum the seats, carpets, and crevices.
Cleaning and Conditioning
- Upholstery: Clean fabric seats with upholstery cleaner and a brush. For leather seats, use a leather cleaner and conditioner.
- Dashboard and Panels: Wipe down the dashboard, center console, and door panels with an interior cleaner. Use a detailing brush for vents and tight spots.
- Glass: Clean the interior glass with a glass cleaner and a microfiber towel.
Step 8: Final Touches
Tire Shine: Apply tire shine to the tires for a glossy finish.
Trim Dressing: Apply a plastic and rubber trim dressing to exterior trim and moldings.
Inspection: Do a final walk-around inspection to ensure every area is clean and polished.
Tips for Maintaining Your Detailed Truck
Regular Washes: Wash your truck regularly to prevent dirt buildup.
Protective Coatings: Consider applying a ceramic coating for long-term paint protection.
Interior Maintenance: Use seat covers and floor mats to protect the interior from wear and tear.
Storage: If possible, store your truck in a garage or use a car cover to protect it from the elements.
Conclusion
Detailing a truck is a meticulous process that requires time, patience, and the right tools. By following this step-by-step guide, you can achieve professional results and keep your truck looking its best. Regular detailing not only enhances the appearance of your truck but also helps maintain its value and longevity. Whether you’re preparing for a show or just taking pride in your ride, proper detailing is key to showcasing your truck in its best light.